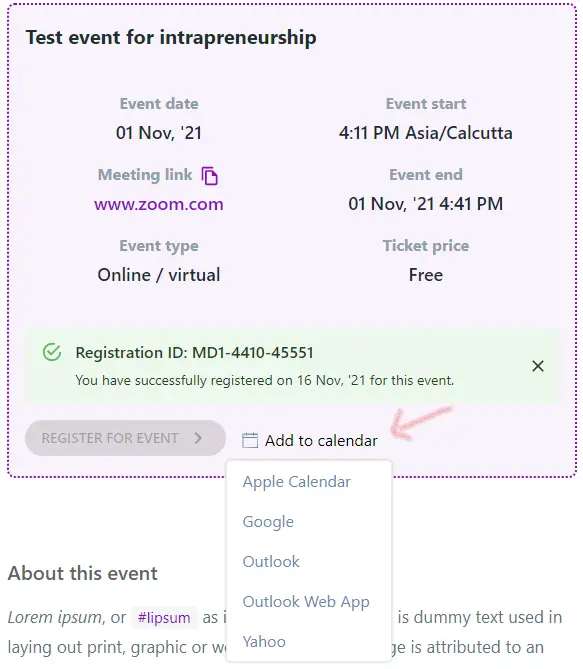
The Event post type is used to post about an offline or online event that is going to take place and comes with an extensive set of features that are available for paid plans.
It can be edited as desired after creation anytime. See an example.
The event flow allows the following for the event creator:
- Collecting extra data during registration via a custom registration form
- Paid ticketing with multiple pricing mechanisms
- Viewing attendee registrations
- Sending reminders to attendees
- Embedding the event post on another site
And the following for the event attendee:
- Member event registration / RSVP, with optional payment
- Adding event to calendar - Outlook, Apple, Google etc

Creating an Event post#
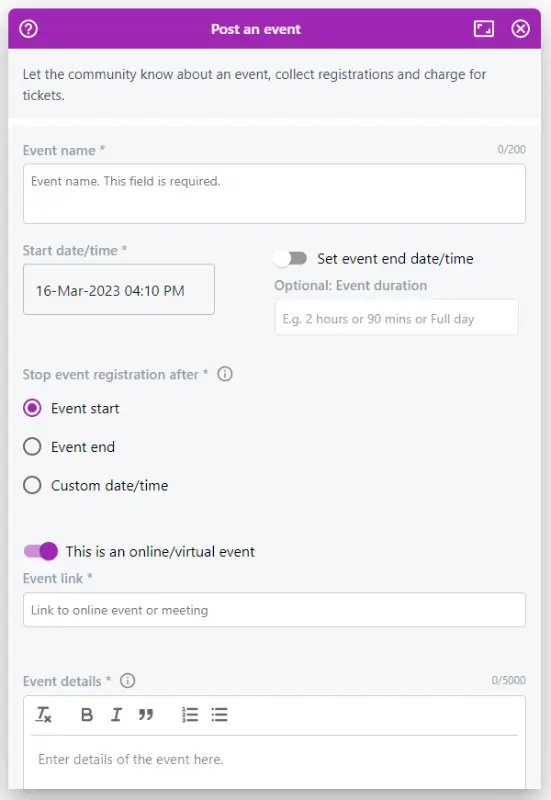
The Event post type is similar to the Update Post type. It has a heading, and a body. Rich text is allowed in the body and a single image can be attached to the post.
Important information about the event can be entered:
- Date
- Start time
- Precise end time or duration
- When to stop the event registration
- Venue
One can select between a precise end date/time, or a general duration value (eg "A few hours").
A precise end date/time enables the Add to Calendar functionality.
Stopping event registration
The event registration can be automatically stopped by setting the "Stop event registration after" field.
- Event start - Event registration will stop when the event starts
- Event end- Event registration will stop when the event ends
- Selected date/time - Event registration will stop at the set arbitrary date/time. For example, this can be used to stop event registration 2 days before start, etc.
3 kinds of event "venues" are supported
- Online / virtual event, with a link to the online event space, say a Zoom call or Google Hangout etc
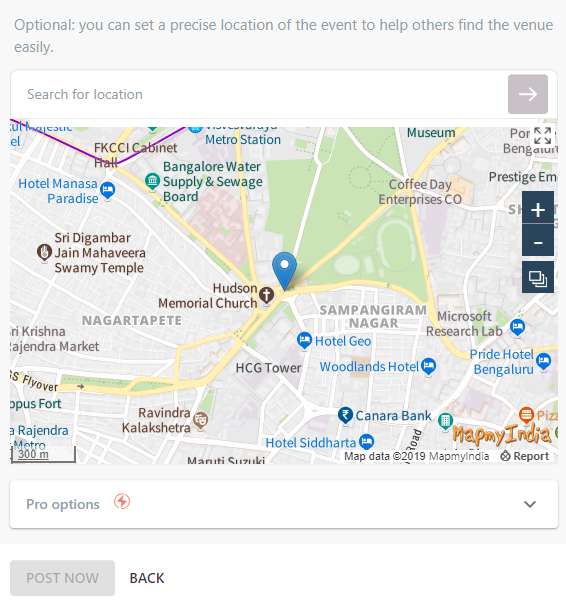
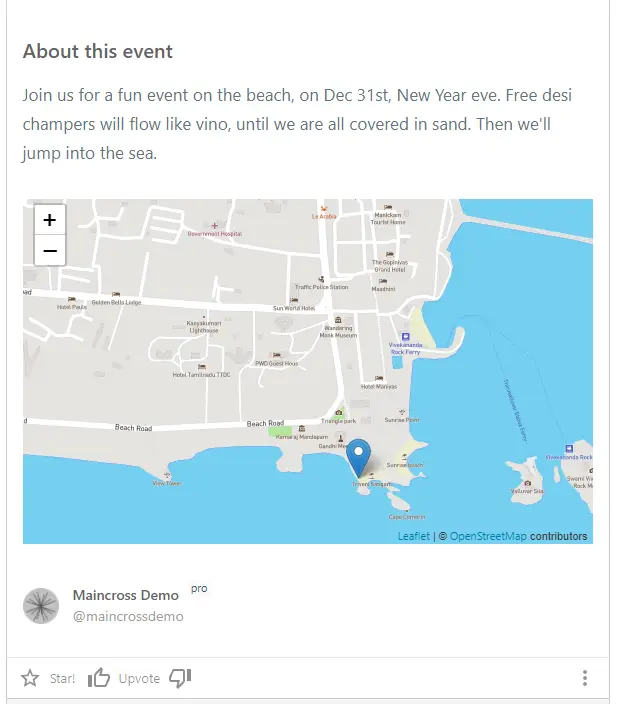
- Offline event with a precise location, locatable on a map
- Offline event with an address
For paid events, the online / virtual event link is shared with the attendee only after successful ticket purchase.
In a post-Covid world, events are mostly online, hence the default is an online event with a link to the online event / meeting / webinar etc.
If its an offline event, then one can further search for an address and attach that into the Event post.
Pro options
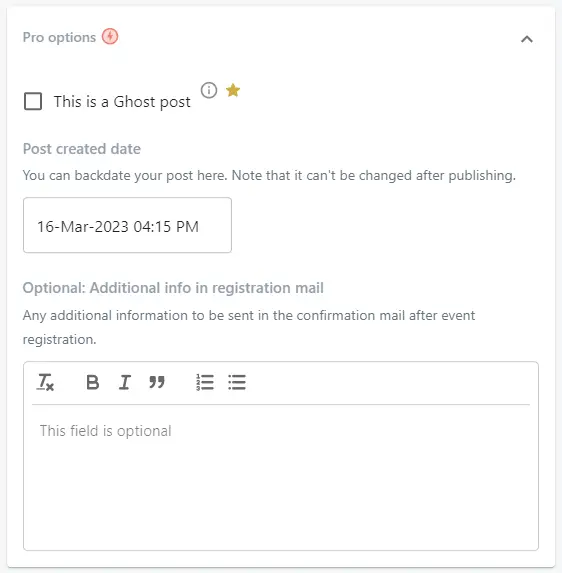
As always, Pro accounts have access to more -
- The Event post can be turned into a Ghost Post
- The post can be backdated.
- The optional additional info field allows the event creator to share any special info or instructions that are disclosed after event registration. This is delivered in the email confirmation mail.
Collecting extra data during registration#
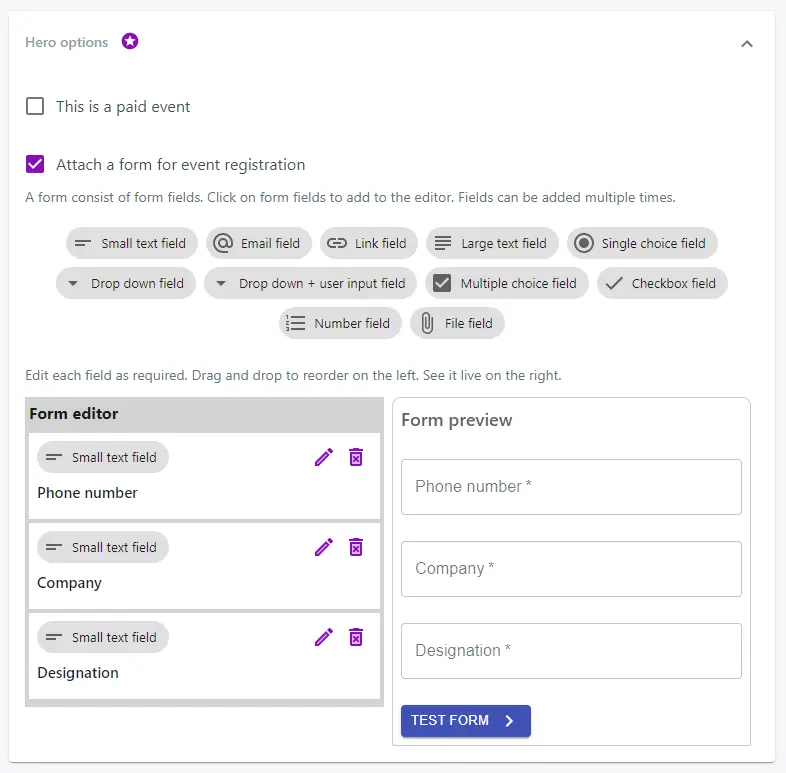
Network Heroes can add on a custom registration form to allow for additional data collection during event registration by members. The custom registration form uses the FormBuilder.
It is highly recommended to have only a few fields in the event registration form so as to minimize the friction.
Paid ticketing / Collecting payment#
Stripe Payment Gateway can be used for any currency worldwide. Razorpay Payment Gateway can be specifically used only in India for INR.
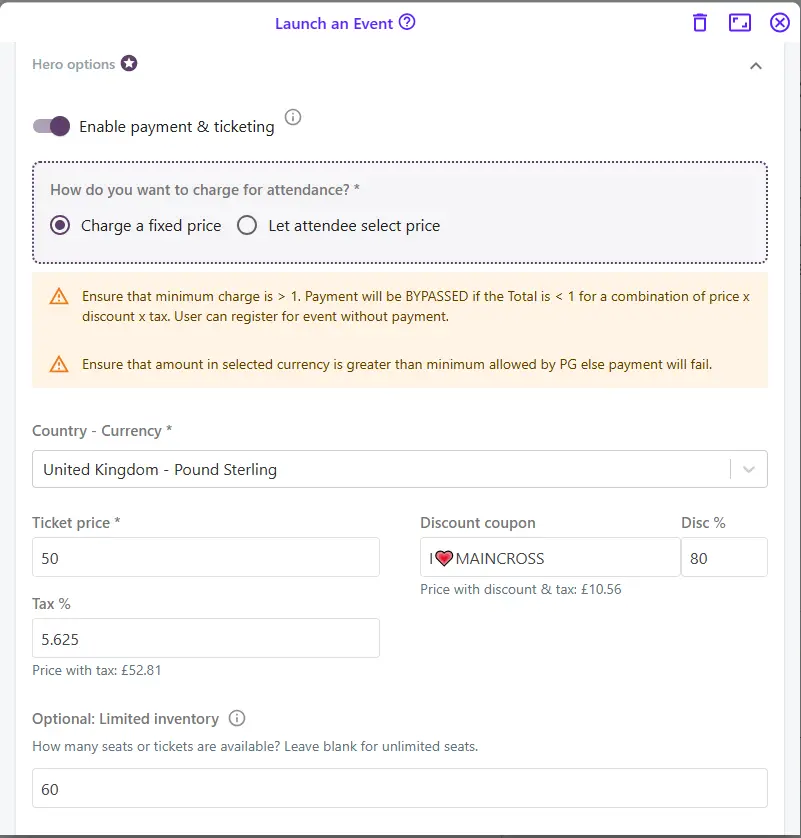
Network Heroes have special privileges and can collect payments for event attendance. With optional tax and discount code, and limited seats.
Pricing mechanisms
- Fixed price per ticket
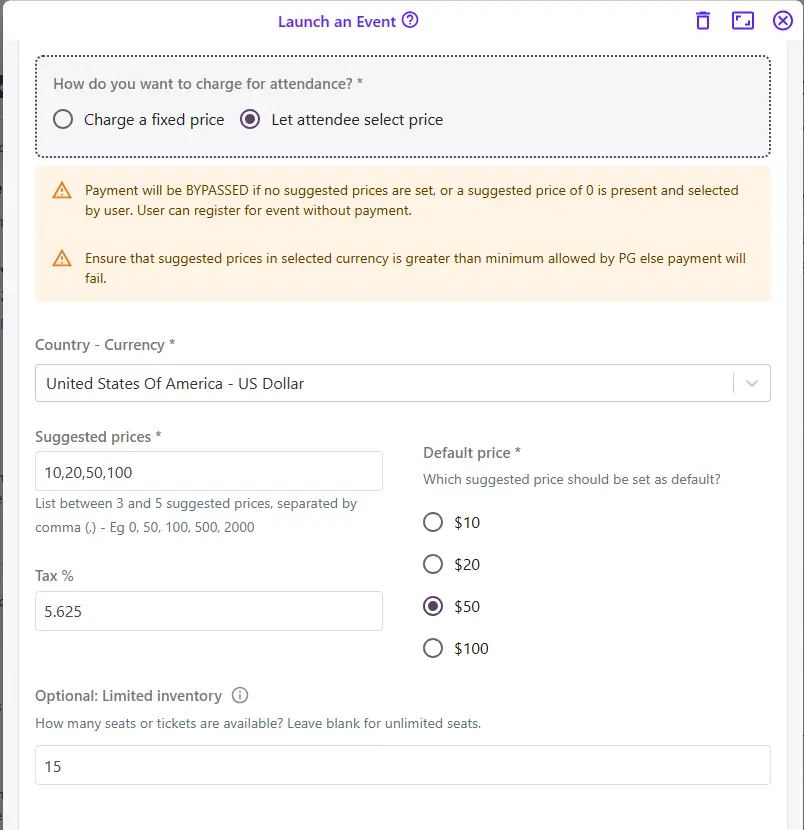
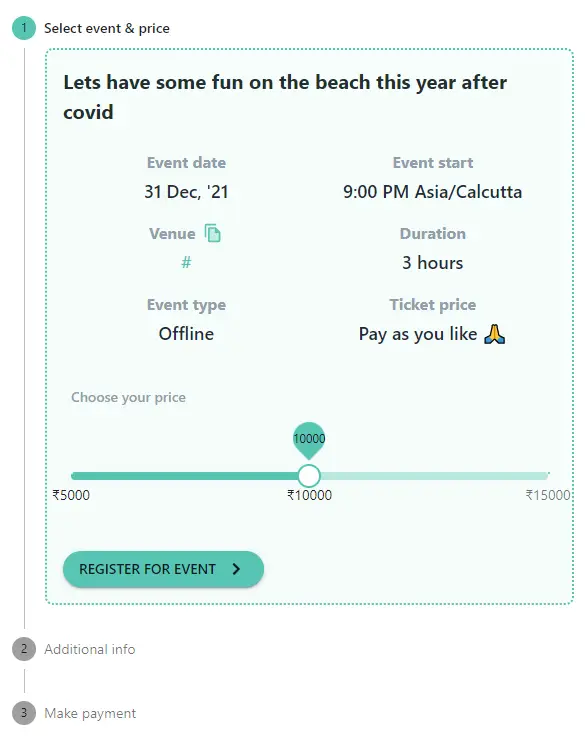
- Pay-as-you-like, ie the attendee is free to pay any amount, including 0
Limited inventory
The number of seats/tickets available can be limited by setting the number of available seats. Every time a successful booking is done, the number of available seats is reduced. Event registration is automatically stopped once available seats reach 0.
Viewing attendee registrations#
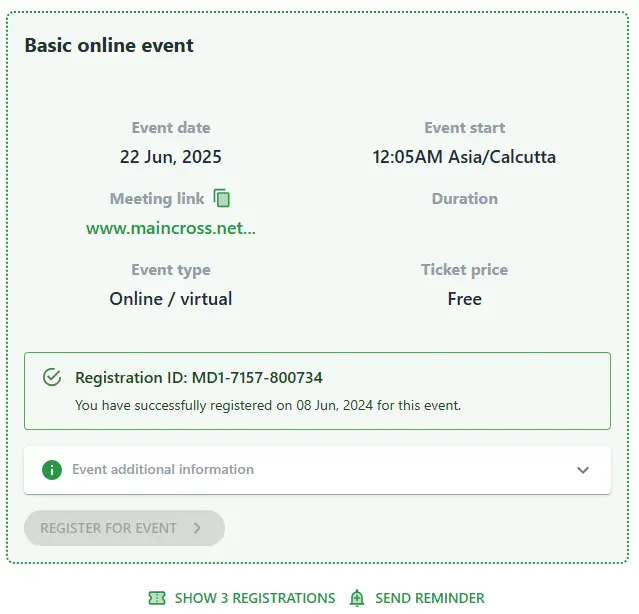
The event creator may view the list of event attendees by clicking on the "Show X registrations" button.
Sending reminders to attendees#
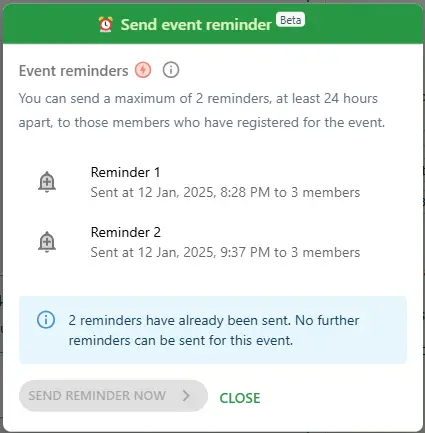
The event creator may manually send a reminder (as a notification) to all the event attendees. A maximum of 2 reminders, at least 24 hours apart, may be sent to those members who have registered for the event. Each member will be notified by their preferred notification method - In-App, Email, Telegram, Native app push notification, Web Push, SMS, etc
A list of previous reminders is displayed:
This feature is available for Pro accounts only.
Viewing, interaction & registration#
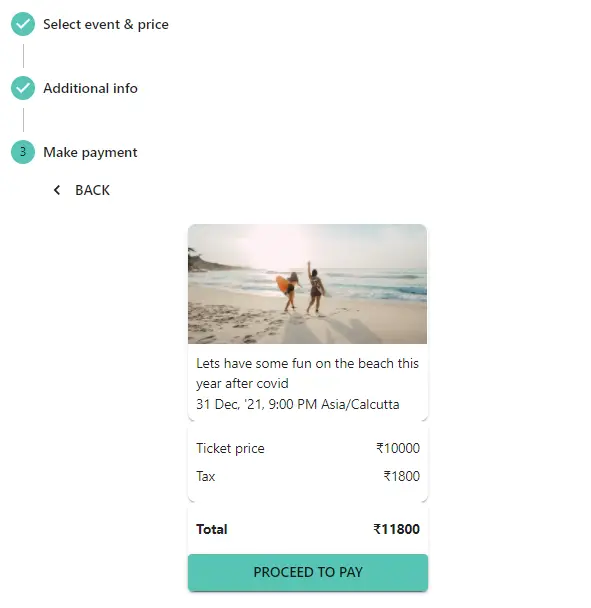
The Event post shows up gorgeously when viewed. See a live demo. (This is a demo event with a sandbox payment gateway. You can proceed to make a payment using the credit card number 4111 1111 1111 1111 and any CVV and expiry date to test how it works.)
Complete with an interactable map (for offline events) and a clickable link which will open up Google Maps and show the location directly.
Attending a free event
Clicking on register for event immediately registers the member for the event. Post registration, a Registration ID is generated and this can be used to track the registration with the event organizers. A confirmation mail is sent immediately.
Attending a paid event
Clicking on proceed to pay opens up the payment gateway for making a purchase. Post purchase, a Registration ID is generated and this can be used to track the registration with the event organizers.
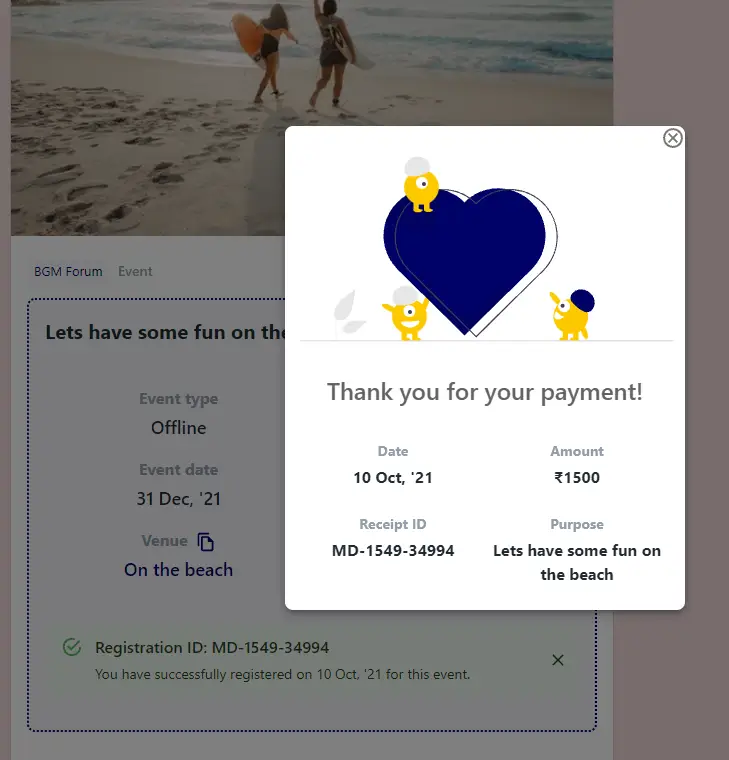
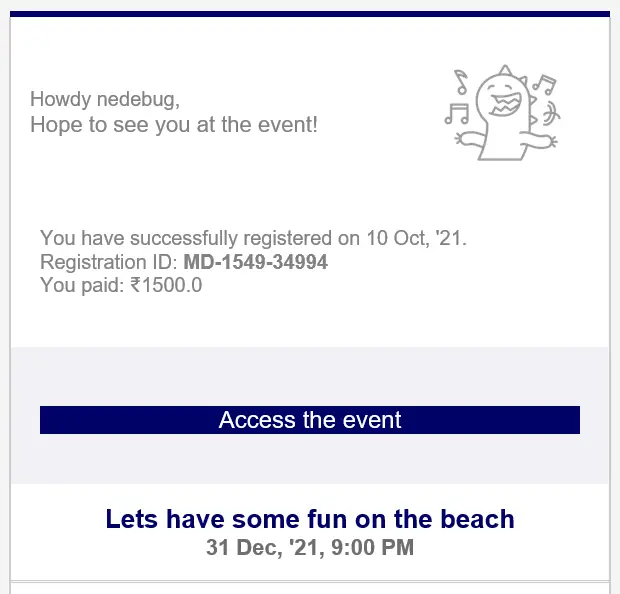
The Registration ID and the online / virtual event link are also delivered in the email confirmation mail, along with other details.
Adding event to calendar#
A member who has registered may add the event to their own calendar by clicking on the "Add to calendar" button. This has different options depending on the calendar one is using - Apple, Google. Outlook etc
This functionality is available only if the event creator has entered a precise event end date/time.
